Humidity is one of the major problems that arise on region which receive subsequent amount of rainfall.
To protect the bathrooms from mold buildup, heavy duty exhaust is installed that keeps the bathrooms moisture free.
The exhaust vents are laid down in the structure of the house.
Types Of Exhaust Fans
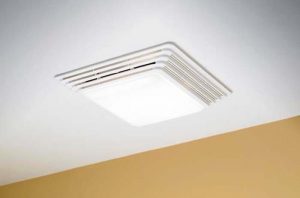
Exhaust fans come in various styles, shapes, and features. Some are solo exhaust fans, while the most popular ones are a solid combination of light and fan.
Exhaust fans with lights come with two types of arrangement. One is that if the light bulbs are installed in a shaft outside the motor, and the other arrangement is where the light bulbs are installed where the motor is assembled.
Sometimes due to fluctuation in electric supply, or majorly, due to the humidity path way through the exhaust fan, the bulb in the exhaust fan fuses or is short wired. In the case you will have to remove the exhaust fan bulb.
Changing the light bulb in a bathroom exhaust fan is an effortless task and does not require much of your time.
However, it requires your utmost technical skills, as we would not want to damage the cover of the exhaust fan or the motor for that matter because is going to get too messy to handle.
Let us see how this can be done. To remove or replace a light bulb, all you have to do is uncover the exhaust fan and replace the light bulb.
Things That You Might Need
- Ladder
- Rubber gloves (optional)
- Screw driver set
- Replacement bulb
Step 1: Be Safe! Cut Off The Electricity Supply
Before planning to change the bulb, make sure that your wires have an insulated covering.
In the case, if there is no such scenario, you might want to turn of the electric supply from the fuse box or the main supply, so that it is safe to touch the exhaust fan.
The reason of doing so is that, exhaust fan has set of nuts that hold the shaft into place, which you would be required to unscrew using a screw driver and you may get a shock if the electric supply is not cut off.
Safety first! Like every time, your first step will be to turn down the main power supply because your life is worth a lot more than a bathroom exhaust light bulb.
Now that you have cut all sources of electricity let’s move on to the next step.
Step 2: Remove The Cover Of The Exhaust Fan
Maintenance of exhaust fans may it be cleaning the blades of the fans or changing of light bulb of your bathroom exhaust fan, it would require you to remove the exhaust fan cover (the obvious).
We have already discussed how to remove the bathroom exhaust fan cover, and if you haven’t read that article yet, now is the time.
Place the ladder in place where you can easily access the exhaust fan. You might want to adjust the ladder in a place where you can easily work your way through the fan to the bulb. To remove the exhaust fan cover, check for any screws holding the cover to the fan’s body.
If there are any screws, rotate them anticlockwise to unscrew the nuts and remove the cover. If no screws are present, check for clips. The clips hold the cover at its place and most of the time, these are click in clips that don’t require any force.
Once you get the idea where the clips are, try removing the cover from one clip and the other will follow and it will be easier to do it. You can squeeze the cover inwards and then slide it out through the clips. Either way, your cover will be removed, exposing the exhaust fan and light bulb.
Maintenance Tip: It is best that you wipe the cover and the blades of the fans with a clean 3M Microfiber cloth, as long it is off the power supply, so that the vent system works completely fine.
Step 3: Remove And Replace The Old Light Bulb
First of all, put on your rubber glove. You would not want to hurt yourself from the fan blades or any sharp edges exposed. Unscrew the old bulb and carefully place is in a place which stops it rolling over.
Take the new bulb out of the box, and screw it in place. However, if this a different exhaust where the bulb is inside a shaft next to the motor, it will be small and very delicate holder. For that you should be careful, not to disturb any wiring or damage the motor while replacing the bulb.
Once you remove the exhaust fan cover, you will have to remove your old light bulb, and that is why step one was so important.
You can remove the light bulb by simply rotating it counterclockwise till it loosens up and leaves its grip.
Note to self: Remember! When you look for a new light bulb for your bathroom exhaust fan, always remember to purchase the one with similar wattage and size, so it fits well inside the exhaust fan.
Once you have the new light bulb, push it inside the bulb holder in your exhaust fan and rotate it clockwise to its maximum limit.
Step 4: Check The Bulb
Once you have replaced the old light bulb, it is better you do a quick check to see if the bulb placed works fine.
In case it doesn’t you will have to go through the whole process of opening the exhaust fan and replacing it again. In some cases, it might not be the bulb rather there might a fault in the wiring.
Try turning the electric supply back again, to check if the bulb works. If the bulb works fine. You can put the exhaust fan’s cover back again.
Step 5: Put The Cover Back
You are all done. You have changed the bulb, checked it as well. Now you can put the cover back on. For that it is safe to turn the electric supply off. Screw in the nut in place of the shaft.
Make sure they are screwed tightly. Put on the cover of the exhaust fan. Screw it into place using a screw driver.
If it was the exhaust fan with the clips, adjust the clips in place and side the cover on the clips that they adjust and fix on place. Make sure you don’t apply too much force that it may break the exhaust cover.
Step 6: Turn On The Electric Supply
Once everything is done, you can safely turn in the electric supply and enjoy the bright and clear bathroom.
It is better, that you keep a check on the short circuiting, when you seem to have electricity fluctuation, as these bulbs work on low voltage.
Higher voltage ends up bursting the filament in the bulbs and they would require replacement again.
Frequently Asked Questions
How can I clean the exhaust fan without getting an electric shock?
It is advised that you cut off the power supply to your exhaust fan, to save yourselves from being electrocuted. Also, it I best that you use rubber gloves, while maintenance of the exhaust fan.
Is it safe to install the exhaust over my bath tub?
It is better to install the exhaust fan, in the middle of the bathroom ceiling, so tat it serves as suction from all the areas of the bathroom.
Installing the exhaust over bath tub, will serve as too much moisture build up and hence, and result in damaging the wiring and the motor of the fan.
This leads to short circuiting because of the moisture.
Which type of exhaust fan should be used?
Exhaust fans usually have Sodo mentioned on their carton. Sodo s the measure of decimals and is known for loudness of the exhaust fan.
It is advised that you buy exhaust fans with lower Sodo value as it is unpleasant to hear and also, the loud buzzing experience creates discomfort.
Which type of Bulb should I use for my exhaust fan?
It is best that you use an LED bulb, that too of 12W wattage, with two pin screw bases, or plug base, or using a 60W, screw base bulbs.
However, the type of bulb depends on the make of the exhaust fan as well. Some exhaust uses a screw base bulb where other come with an advanced assembling of two pin plugs.
Which bulb will be most suited for my exhaust? Fluorescent tor incandescent?
Incandescent bulbs use relatively higher voltage than fluorescent bulbs. It is best advised that we use LED bulbs for exhaust fan, to ensure energy saving and lower cost on the pocket.
They use lower electric supply and generate twice the amount of light as bright as incandescent light.
Conclusion
Maintenance of exhaust fans is necessary, you would not want any moisture build in the bathrooms, especially if your bathrooms have gone through extensive anti-slipping treatments or mold treatments.
Always, try replacing the bulbs of same wattage and the same make, to maintenance the quality and output without damaging the system.
Leave a Reply